Developing a Rider Position from D to A
A National Examiner explains the progression through USPC riding test expectations.
By Asia Thayer
The United States Pony Club’s (USPC) riding and horse management curriculum is a unique educational system guided by Standards of Proficiency that precisely build upon one another to safely develop youth and adult equestrians from the most beginning stages to an active horse person capable of teaching riders and training horses. For mounted education, each level, D1–A, provides the riding test expectations and the skills that complement those expectations. This is the standard of riding that Pony Club members are educated and evaluated on. Whether a new member, long-time member, parent, instructor, or leader, it is helpful to gain a clear understanding of the path of rider education and development from the beginning D-1 to the highest level of rider education, the “A”.
In this article, we will take a deep dive into the SOP RTEs and education goals, from D-1 to A, leading you to a better understanding of how one level progressively builds on the next. For the purposes of this article, and explaining the RTEs, the focus is Eventing SOPs: Dressage, Hunt Seat Equitation, Western, and Show Jumping SOPs are all based on the same core terms and riding expectations.
The Basic Balanced Position
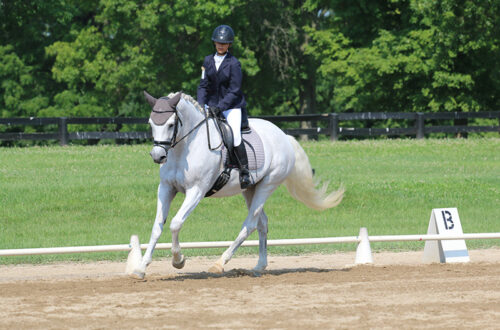
With the goal of developing a safe and competent rider, let’s start at the beginning, the foundation of all disciplines: the basic balanced position (BBP). The BBP is the universal basis of specialized riding. It is the foundation used to develop balance for a rider pursuing any equestrian discipline.
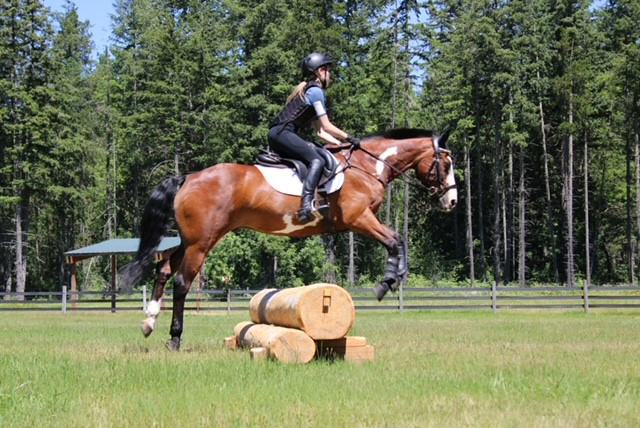
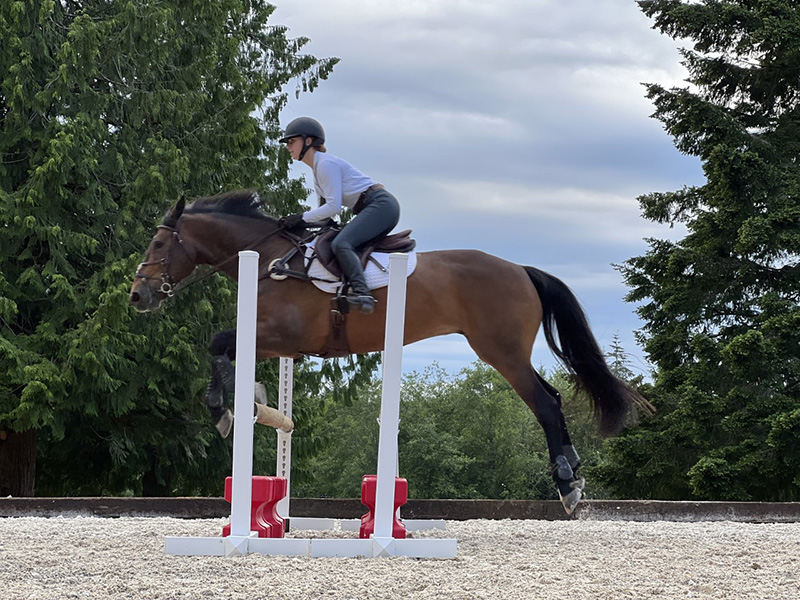
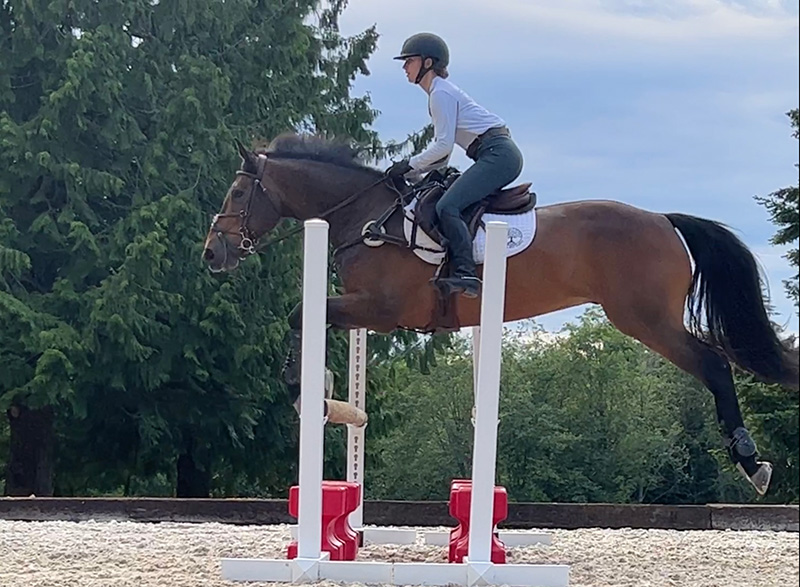
As described in the Instruction Program Definition of USPC Riding Test Expectation Terms document (bit.ly/uspc-rte-terms), and the USPC D and C manuals, the BBP on the flat “permits a vertical line to be drawn from the top of the rider’s head, through the ear, point of shoulder, hip joint, and ankle. As stirrups are shortened for work over fences, the upper body inclines forward with a flat back to bring the shoulder over the knees while the ankle remains under the hip.”
Feeling the BBP
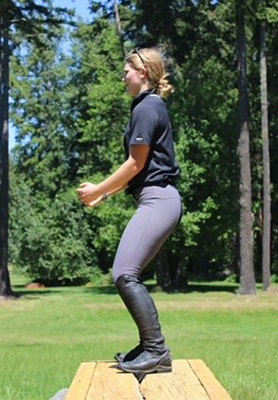
To understand better, you can experience this kinesthetically, through feel. Find a partner and stand so that you can view one another from the side and try this exercise:
- Stand with your feet about 2 feet apart with toes slightly pointed outward.
- Bend your knees the amount they would bend if you had stirrups at appropriate length for riding on the flat (western, hunt seat, or dressage),
- Stretch your torso upward, bend your elbow and hold your hands in front of you to create a line to an imaginary bit in the horse’s mouth.
This position should allow you to feel relaxed and balanced over your feet, and when viewing your partner from the side you should see a vertical alignment from the ear, shoulder, hip, and ankle and a straight line from the elbow to the imaginary bit.
Feeling Jump Position
Now for jump position, continue with your partner, in this exercise:
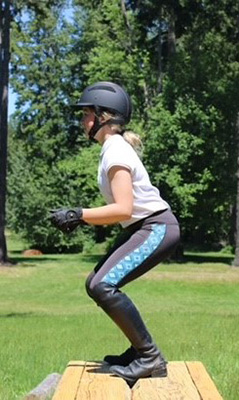
- Shorten your imaginary stirrups and squat your hips further downward, which will require more flexion in your hip, knee, and ankle. Be sure not to cheat by lowering your upper body, increasing flexion in the hip without increasing the flexion in your knee; I call the “folded hip but open knee” a “duck butt” position. To prevent a “duck butt” position, the hip and knee should flex a similar amount.
- Squat into a jump position and hold it. Now look at your partner from the side. You should see their hip over their ankle with a flat back inclined forward and a flexed hip angle. The shoulder should be over or behind the knee.
- Another way to look at the balance of a jump position, especially when hip and knee angle flex to absorb a big jump, is to draw a line from the back of the rider’s behind to the ground and another line from the shoulder to the ground—the rider’s foot should be in the middle of those two lines. The rider’s body is then balanced over their feet.
Maintaining the Balanced Position
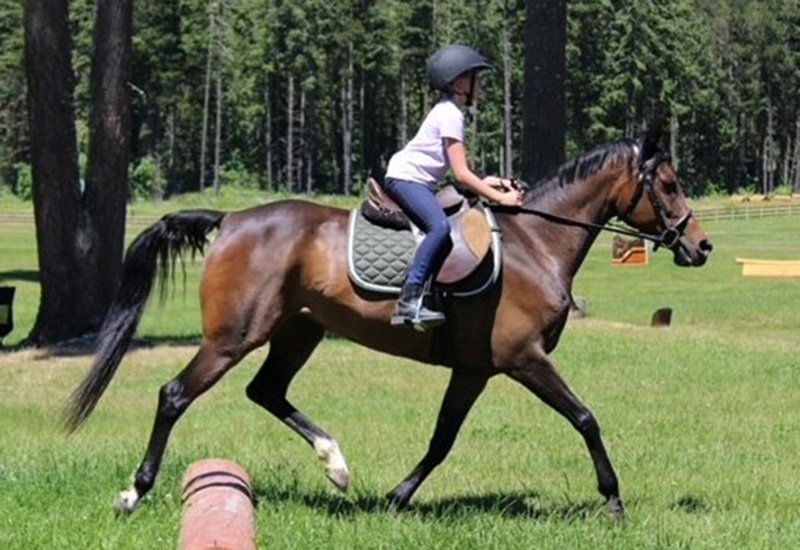
Once a rider has developed the balanced position, the next step is to improve security by building strength to maintain the balanced position. This is the primary goal of D-level mounted education in Pony Club. Looking at the RTE (listed on SOPs and test sheets), we educate a D1 rider to demonstrate a BBP at the halt and walk, the D2 to maintain a BBP at the walk and trot, and the D3 is educated to ride in a BBP at the walk, trot, and canter while developing a secure Base of Support (BoS) and a steady position over fences. The D level of rider development is focused on producing a rider who can ride at all three gaits, and over fences in a balanced and secure position in a safe manner.
You may have noticed that a new term snuck in at the D-3: secure BoS. Where is a rider’s BoS? For all disciplines, it is the parts of the position that are in contact with the saddle or mount. In a walk, sitting trot, and canter, the BoS is the seat, inner thigh, and inner calf, supplemented by the base of weight—the heels. In posting trot and jump positions, the BoS is the inner calf, supplemented by the lower inner thigh when needed. The development of a secure BoS, particularly the lower leg, is essential for the rider’s ability to maintain balance and security on the flat and over fences.
Here’s another exercise to kinesthetically feel that BoS. Go back to the earlier BBP jump position:
- Your feet should be slightly pointed outward allowing the inside of your calf to make contact with the imaginary saddle.
- Now squat down then up (as if posting or absorbing a horse’s jump), folding your hip and knee while staying tall in your shoulders. This should feel secure and balanced to do.
- Now stand with your toes pointed about 90 degrees outward so that the back of your calf makes contact with the imaginary saddle.
- Once again squat down and then up, this should be difficult because the hinging joints (knees and hips) cannot flex smoothly when the BoS is incorrectly on the back of the calf.
In a mounted lesson, to help a rider feel a secure BoS, have the rider halt in a BBP with heels down. Using your hands to hold the calf in place against the saddle, have the rider pretend post at the halt. The goal is for the rider to feel posting from the knee hinging open and closed while the lower leg maintains a secure (not gripping) contact with the saddle and side of the horse.
Developing into C
Education at the C level aims to increase the strength to maintain BBP and BoS and educates the rider on how to use aids to communicate with the horse. The C-1 rider demonstrates a secure BoS, BBP, and use of natural aids. The C-2 rider maintains a secure BoS and BBP, while developing an independent seat and coordinated use of the aids. The C-3 rider maintains a BBP with secure BoS and should demonstrate the development of an independent seat and coordinated aids.
The C-2 brings two new terms to the RTE: independent seat and coordinated use of the aids. When giving a Standards presentation, I often find that the term “independent seat” may be interpreted in different ways when the definition is actually fairly simple and tangible.
The Independent Seat
Let’s start with an exercise to feel an independent seat before we define it. Go back to your standing BBP. Now start to get a “groove” on, smoothly move your body in any repetitive motion. When you feel comfortable in your groove, while maintaining BBP, brace one elbow. What happens to the fluid, groovy movement of your hips and seat? You should feel that your body’s ability to stay with your groove is inhibited—your seat can not independently follow the groove when you brace in one elbow.
Restart your groove, try it again with your chin poking out, a pinched knee, or a braced back. Hopefully you are starting to feel that if any joint in your body braces, the smoothness of your groove is inhibited. You are unable to maintain the independent, relaxed, groovy flowing of your hips and seat if any joint braces in your body.
Now let’s look at the definition of an independent seat, which is defined as “a position with relaxed, open joints that allows the rider’s body to flow with the movement of the horse and remains unchanged by action of the hands and legs. Tension and bracing in any joints of the rider’s body prohibits development of an independent seat.”
Independent seat is an integral part of rider development to demonstrate more advanced skills. A rider needs to begin development of an independent seat to effectively coordinate the aids—seat, legs, and hands—to demonstrate more skills.
Developing into B and A
The B rider maintains the BBP and secure BoS and, while maintaining an independent seat, can demonstrate effective tactful use of aids. The tactful use of aids is the new term that enters the RTE at the B; the aids are more subtle and perceptive to the horse.
By now I hope you’ve noticed a trend in the development of a rider from the D to the A: every RTE begins with the foundation of BBP with a secure BoS. The A rider must maintain a BBP with secure BoS, while showing a confirmed independent seat and demonstrate effective coordination and timing of aids on different mounts at various stages of training, while riding with tact and empathy. The key elements of the A are the confirmed independent seat and the sophistication in coordination of aids with the timing necessary to consistently produce elements of the training scale on all horses.
When you look at the progression of the standards of proficiency riding test expectations, you can see how each level builds on the previous level in a repetitive, yet progressive, manner. The skills on the SOPs are chosen to align with the RTE for each level.
For example, a D-3 who is not beginning to develop an independent seat may be too stiff in their joints to safely jump a 3’3” jump. Therefore, the skill of jumping 3’3” is not added until the C-3 level when a rider can demonstrate the development of an independent seat and has joints loose enough to absorb a 3’3” jump effort safely and securely.
In summary, this progression helps riders develop into a safe, secure, and confident rider, in a natural and logical process.
This article about rider development through certifications was originally published in the Summer 2022 issue of Discover USPC magazine. Read more content from that issue.
USPC National Office
The United States Pony Clubs, Inc. (USPC or Pony Club) is the largest equestrian educational organization in North America. Started in 1954, the organization has developed curriculum that teaches safe riding skills and the care of horses through mounted and unmounted lessons. Through Pony Club, members have fun with horses and make lifelong friends while they develop skills, habits, and values that extend well beyond the barn and last a lifetime. Many members apply what they have learned in the USPC program successfully in their careers, educational and volunteer opportunities, and other life pursuits.


You May Also Like
Para Dressage Rider Genevieve Rohner and Mom Lexi Rohner
Dressage Through the Movements: Tips for Riding Through a Dressage Test