Three Exercises to Improve Seat Awareness
An excerpt from The Athletic Equestrian by Sally Batton with Christina Keim
Just as with the walk and trot, the canter can be ridden in the working, lengthened, or shortened variations. In general, equitation riders are not asked to demonstrate a shortened canter during a flat class or a test, but it is an important skill when it comes to jumping. Equitation riders are frequently asked to demonstrate a lengthening of the canter, as well as the hand gallop. While both of these exercises encourage the horse to take a longer stride, how the rider achieves this change is fundamentally different.
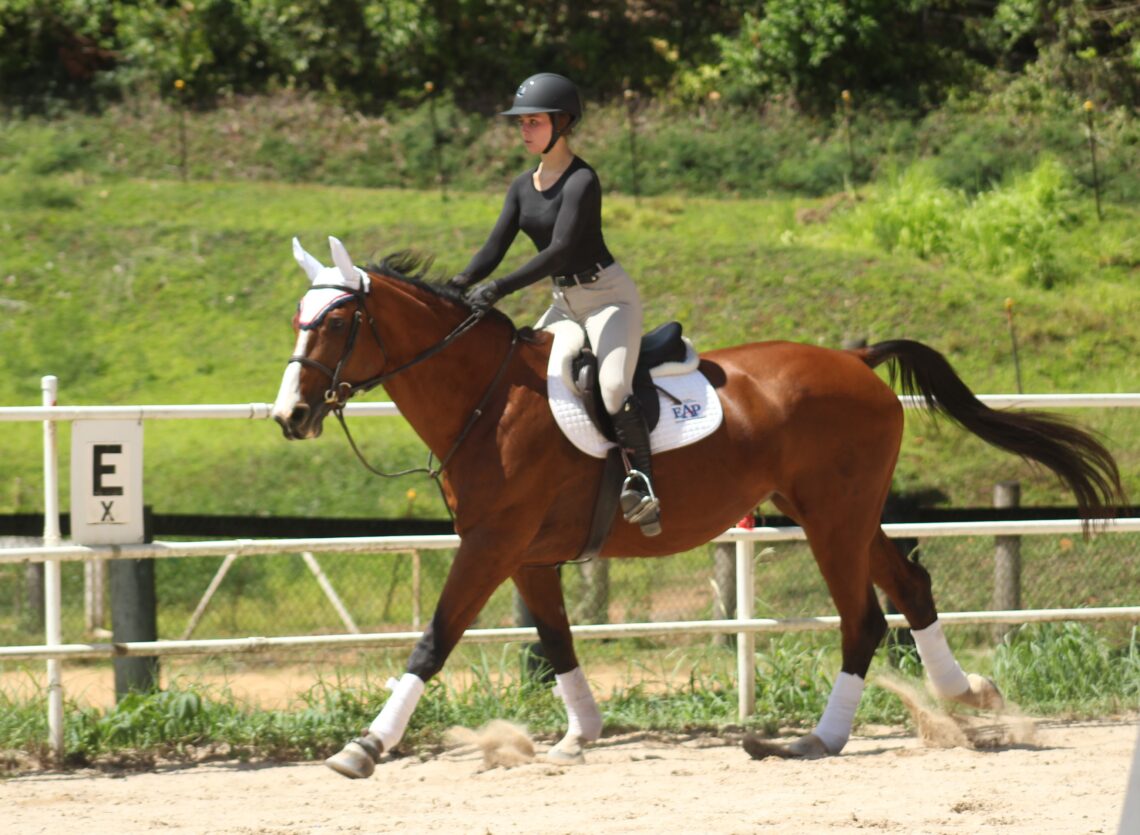
Exercise: Lengthening the Canter
During the hand gallop, the rider is in the two-point position, and actively squeezes with her legs to encourage the horse forward. Depending on the horse, the rider may also push her hands a few inches forward to allow for further lengthening of his back. The name “hand gallop” comes from the term “in hand,” meaning a controlled gallop, as opposed to that of a racehorse, where the jockey just encourages the horse to go as fast as he can.
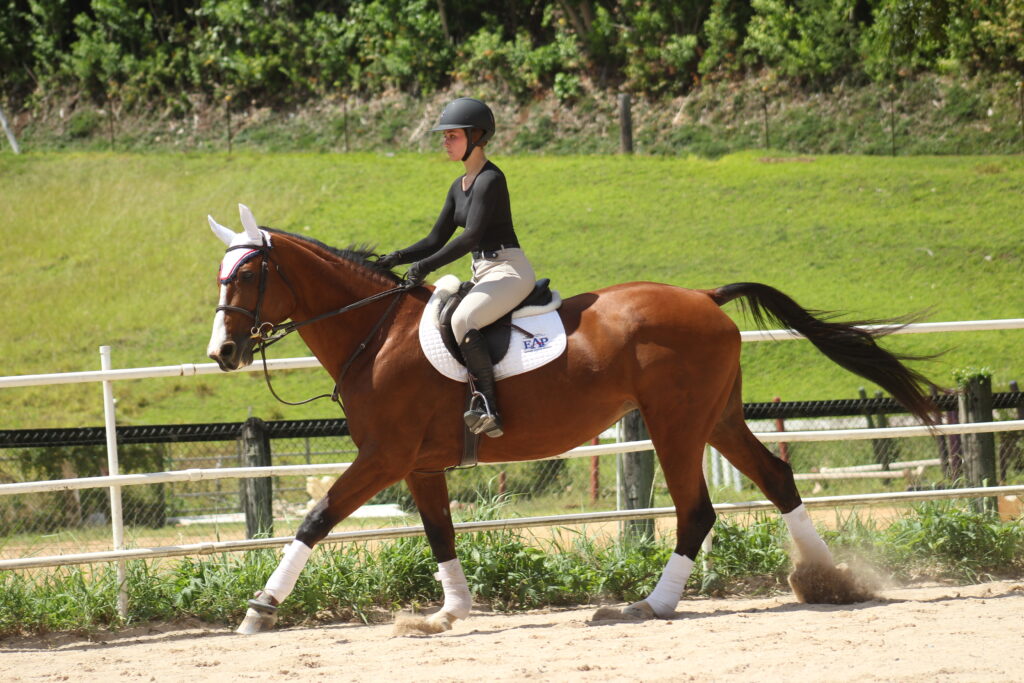
By contrast, in a lengthened canter, the rider stays in her full seat while maintaining 5 pounds of pressure in each rein to support the horse’s forehand. The rider will increase the arc of her following seat to an exaggerated “J,” with a shorter movement on the hook of the “J” and a longer movement on the arm of the “J.”
What do I mean by your seat following a “J”? The rider’s pelvis moves in a “J” shape on the right lead, and a reversed “J” on the left. On the right lead, as the horse strikes off with the left hind, the rider’s pelvis comes down, in, and forward; as the diagonal pair of legs touch down, the rider’s pelvis starts moving downward to the bottom hook of the “J.” As the inside fore (leading leg) reaches forward, the seat swings forward, making the stem of the “J.” When the front limb strikes and pulls the horse forward, the rider’s seat returns to its starting place.
What I call the “ice cream scoop mechanic” will push harder in each stride, helping the horse to engage his hindquarters and pushing the stride longer from back to front. To replicate the “forward swing” feeling of an engaged seat, think of your tailbone as an ice cream scoop. Use your abdominal muscles, without slouching over, to pull the ice cream scoop forward. If you try to push the tailbone forward with your gluteal muscles, you will become stiff and tuck the tailbone too far under.
This seat movement creates an enormous amount of energy, so it is essential that the rider maintain her contact on the reins. Otherwise, the horse will lose his balance, fall to the forehand, and risk losing the lead or the gait.
Exercise: Shortening the Canter
Shortening the canter stride on the flat is how riders practice a skill they will need for jumping
success. From the working canter, begin to reduce the following of the pelvis until the “J”
movement becomes smaller. Take back from the elbow slightly (if the horse is quite sensitive,
the rider may only need to sponge the reins) and hold the seat very still, without driving the
tailbone into the saddle. The rider is still following the canter, but by constricting the abdominal
muscles, she will limit how far forward the seat swings in each stride.
The most common challenge is that the rider tenses muscles that should be kept relaxed—in
particular, the gluteals. Additionally, there can be a tendency to push the seat above the saddle
or bring the shoulders too upright over the seat. Any of these mistakes are likely to cause the horse to break into the trot. If this happens, take a deep breath, reset, reestablish the working canter, and try again.
Once your seat is refined enough to shorten the stride in the canter, you will know that you have really done the homework required to achieve an independent, following, and elastic seat! But note, sometimes a rider thinks she is influencing the length of her horse’s stride, when in reality, all she is changing is the horse’s speed. To understand the difference, find a friend and try this unmounted exercise.
Exercise: Changing Speed vs. Changing Stride Length
Lay a tape measure out in a straight line. Have your friend place her hands on her shoulders and in her “normal” walking stride, count the number of steps she takes. While she counts, watch the rate of movement of her shoulders, rather than her legs, to get a sense of her speed. Now, ask your friend to walk the same distance again, taking smaller steps. You will see that she maintains the same rate of movement (speed) but takes more steps to cover the same distance. Have her return to her “normal” walking stride length. Finally, ask her to take bigger steps; again, the number of strides used to cover the distance will decrease but her speed will stay the same.
You can also practice feeling the difference for yourself. Measure out a set distance and count the number of steps you take to cross it when in your “normal” stride. Then try covering the distance in shorter steps, then “normal,” then longer. Feel how the rate of movement is essentially the same, even though your legs may be moving faster or slower.
This excerpt is adapted from The Athletic Equestrian by Sally Batton with Christina Keim and reprinted with permission from Trafalgar Square Books (www.horseandriderbooks.com). Read more and help support Pony Club! When you shop from HERE on USPC’s partner page, Pony Club receives a 15% commission on your order.
This article about exercises to improve seat awareness was originally published in the Spring 2022 issue of Discover USPC magazine. Read more content from that issue.
USPC National Office
The United States Pony Clubs, Inc. (USPC or Pony Club) is the largest equestrian educational organization in North America. Started in 1954, the organization has developed curriculum that teaches safe riding skills and the care of horses through mounted and unmounted lessons. Through Pony Club, members have fun with horses and make lifelong friends while they develop skills, habits, and values that extend well beyond the barn and last a lifetime. Many members apply what they have learned in the USPC program successfully in their careers, educational and volunteer opportunities, and other life pursuits.


You May Also Like
Club Highlight: Deep Run Hunt Pony Club
Give USPC Trail Competition a Try